Simplifying DNS Management with Cloudflare
In the early days of the internet, loading a website was a straightforward process: your request traveled to a server, which then delivered the requested page. However, when too many requests flooded a server, it could crash, leaving visitors stranded. Cloudflare emerged to tackle these issues head-on, leveraging a robust edge network to deliver content and services as swiftly as possible, ensuring users receive information without delay.
Moreover, Cloudflare provides robust security measures, safeguarding internet properties from various malicious activities, including DDoS attacks and intrusive bots. Additionally, features like SSL and content distribution are seamlessly integrated into Cloudflare’s offerings, benefiting millions of internet properties worldwide.
The Importance of DNS Management
DNS (Domain Name System) management is crucial for directing internet traffic to the correct destinations. Cloudflare simplifies this process, offering a comprehensive DNS service that enhances security and performance.
Protecting Against DDoS Attacks
DDoS (Distributed Denial of Service) attacks pose a significant threat to online services, disrupting operations by overwhelming servers with malicious traffic. Cloudflare’s DDoS mitigation operates in four stages:
- Detection: Identifying and distinguishing legitimate traffic from attack traffic.
- Response: Intelligently dropping malicious bot traffic while absorbing the rest.
- Routing: Efficiently directing manageable traffic chunks to prevent denial of service.
- Adaptation: Analyzing traffic patterns to fortify against future attacks.
Examples of DDoS Attacks
- ACK Flood DDoS Attack: Overloads servers with TCP ACK packets, crippling their ability to serve legitimate users.
- DNS Amplification Attack: Exploits open DNS resolvers to inundate target servers with amplified traffic, rendering them inaccessible.
Simplifying DNS Setup with Cloudflare
Transitioning your domain’s DNS management to Cloudflare is a straightforward process, offering enhanced security and performance benefits. Here’s how to do it:
1. Sign Up with Cloudflare
First you will need to create a Cloudflare account. You will be presented with a set of plans to chose from. Since we are building a hobby project, I recommend starting with the free plan as show:

2. Enable Cloudflare for your domain
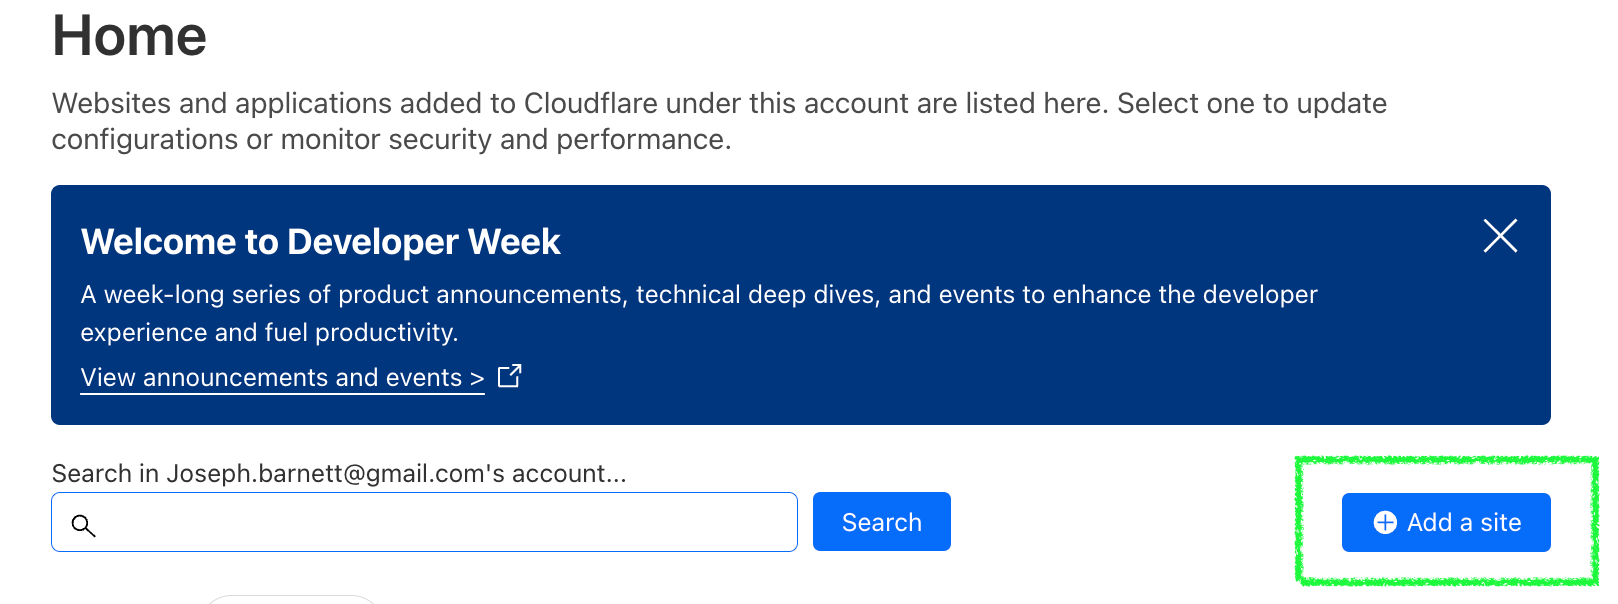
Click the Add a Site button in Cloudflare to add your domain.
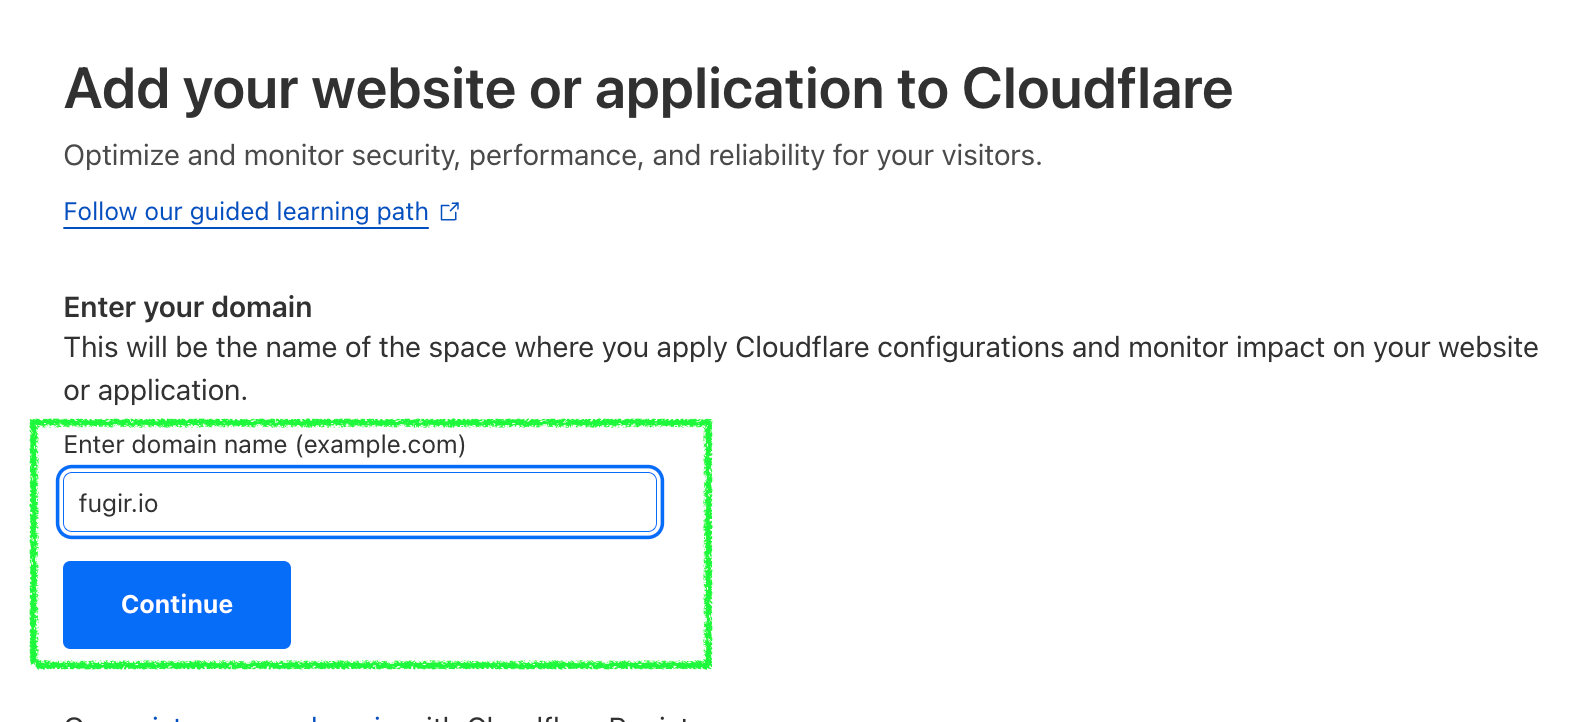 Enter your site name, and click
 Continue
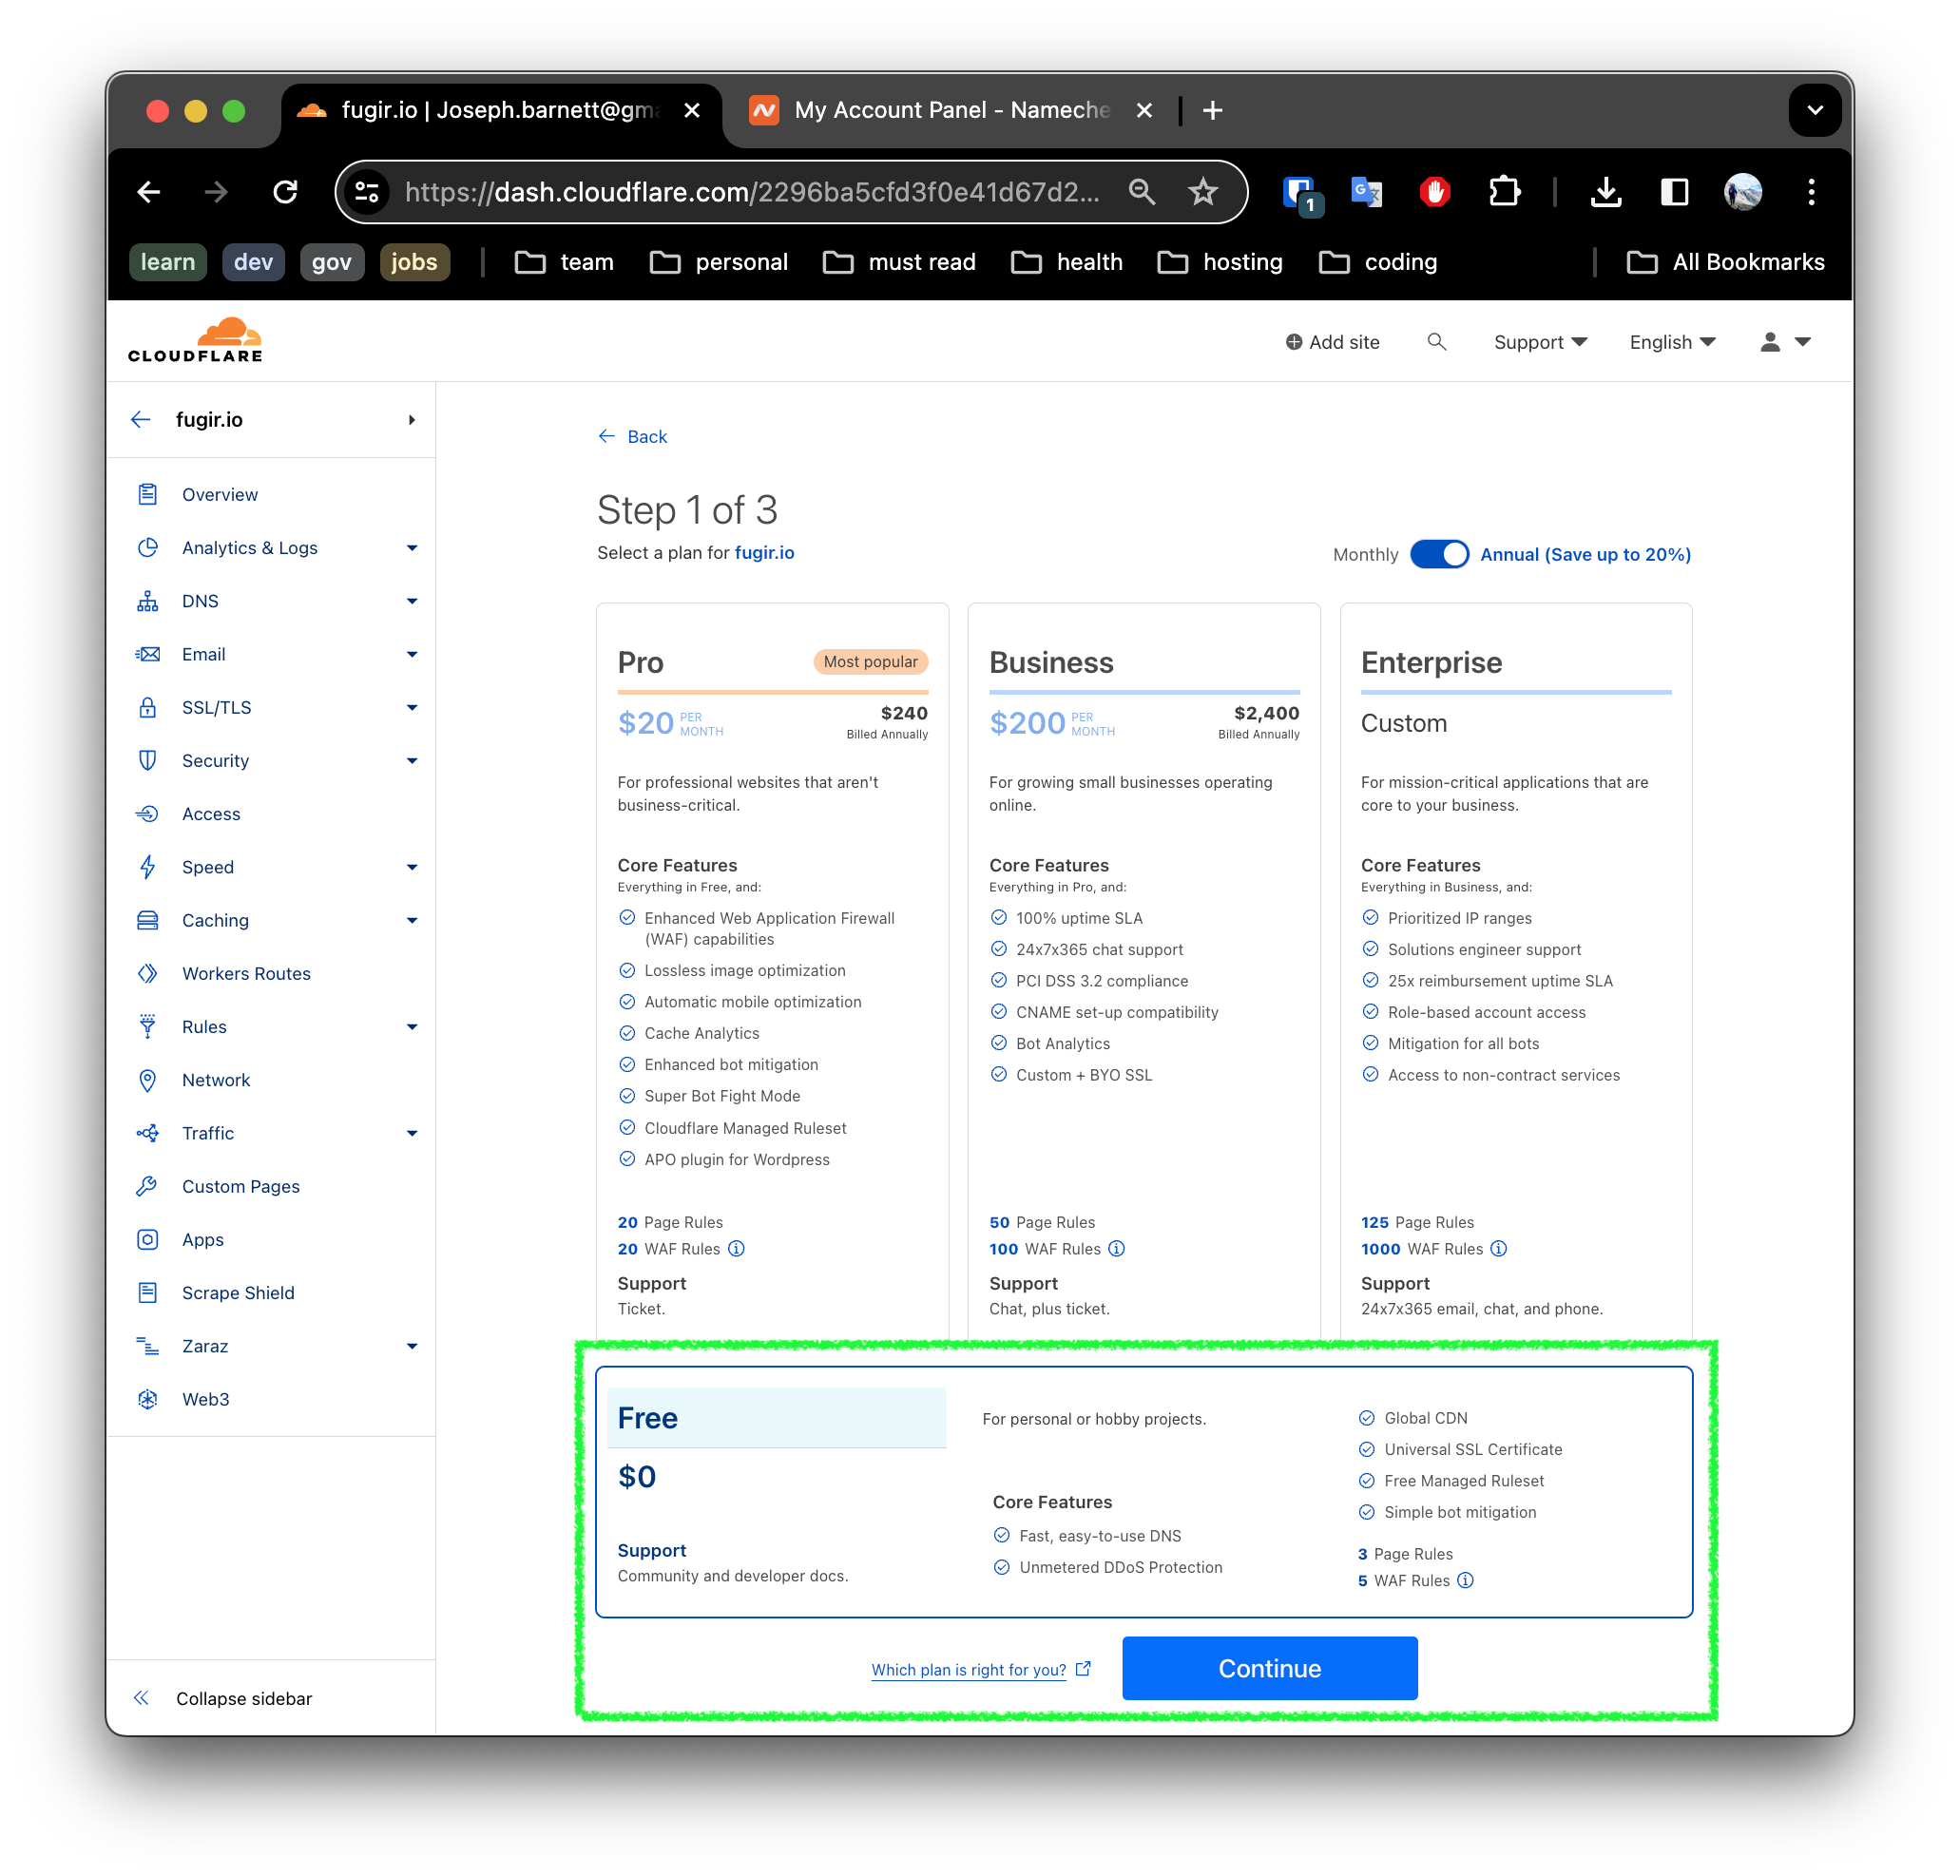
3. Select the subscription level
Since we are building a hobby site - we will select the free option and Continue.
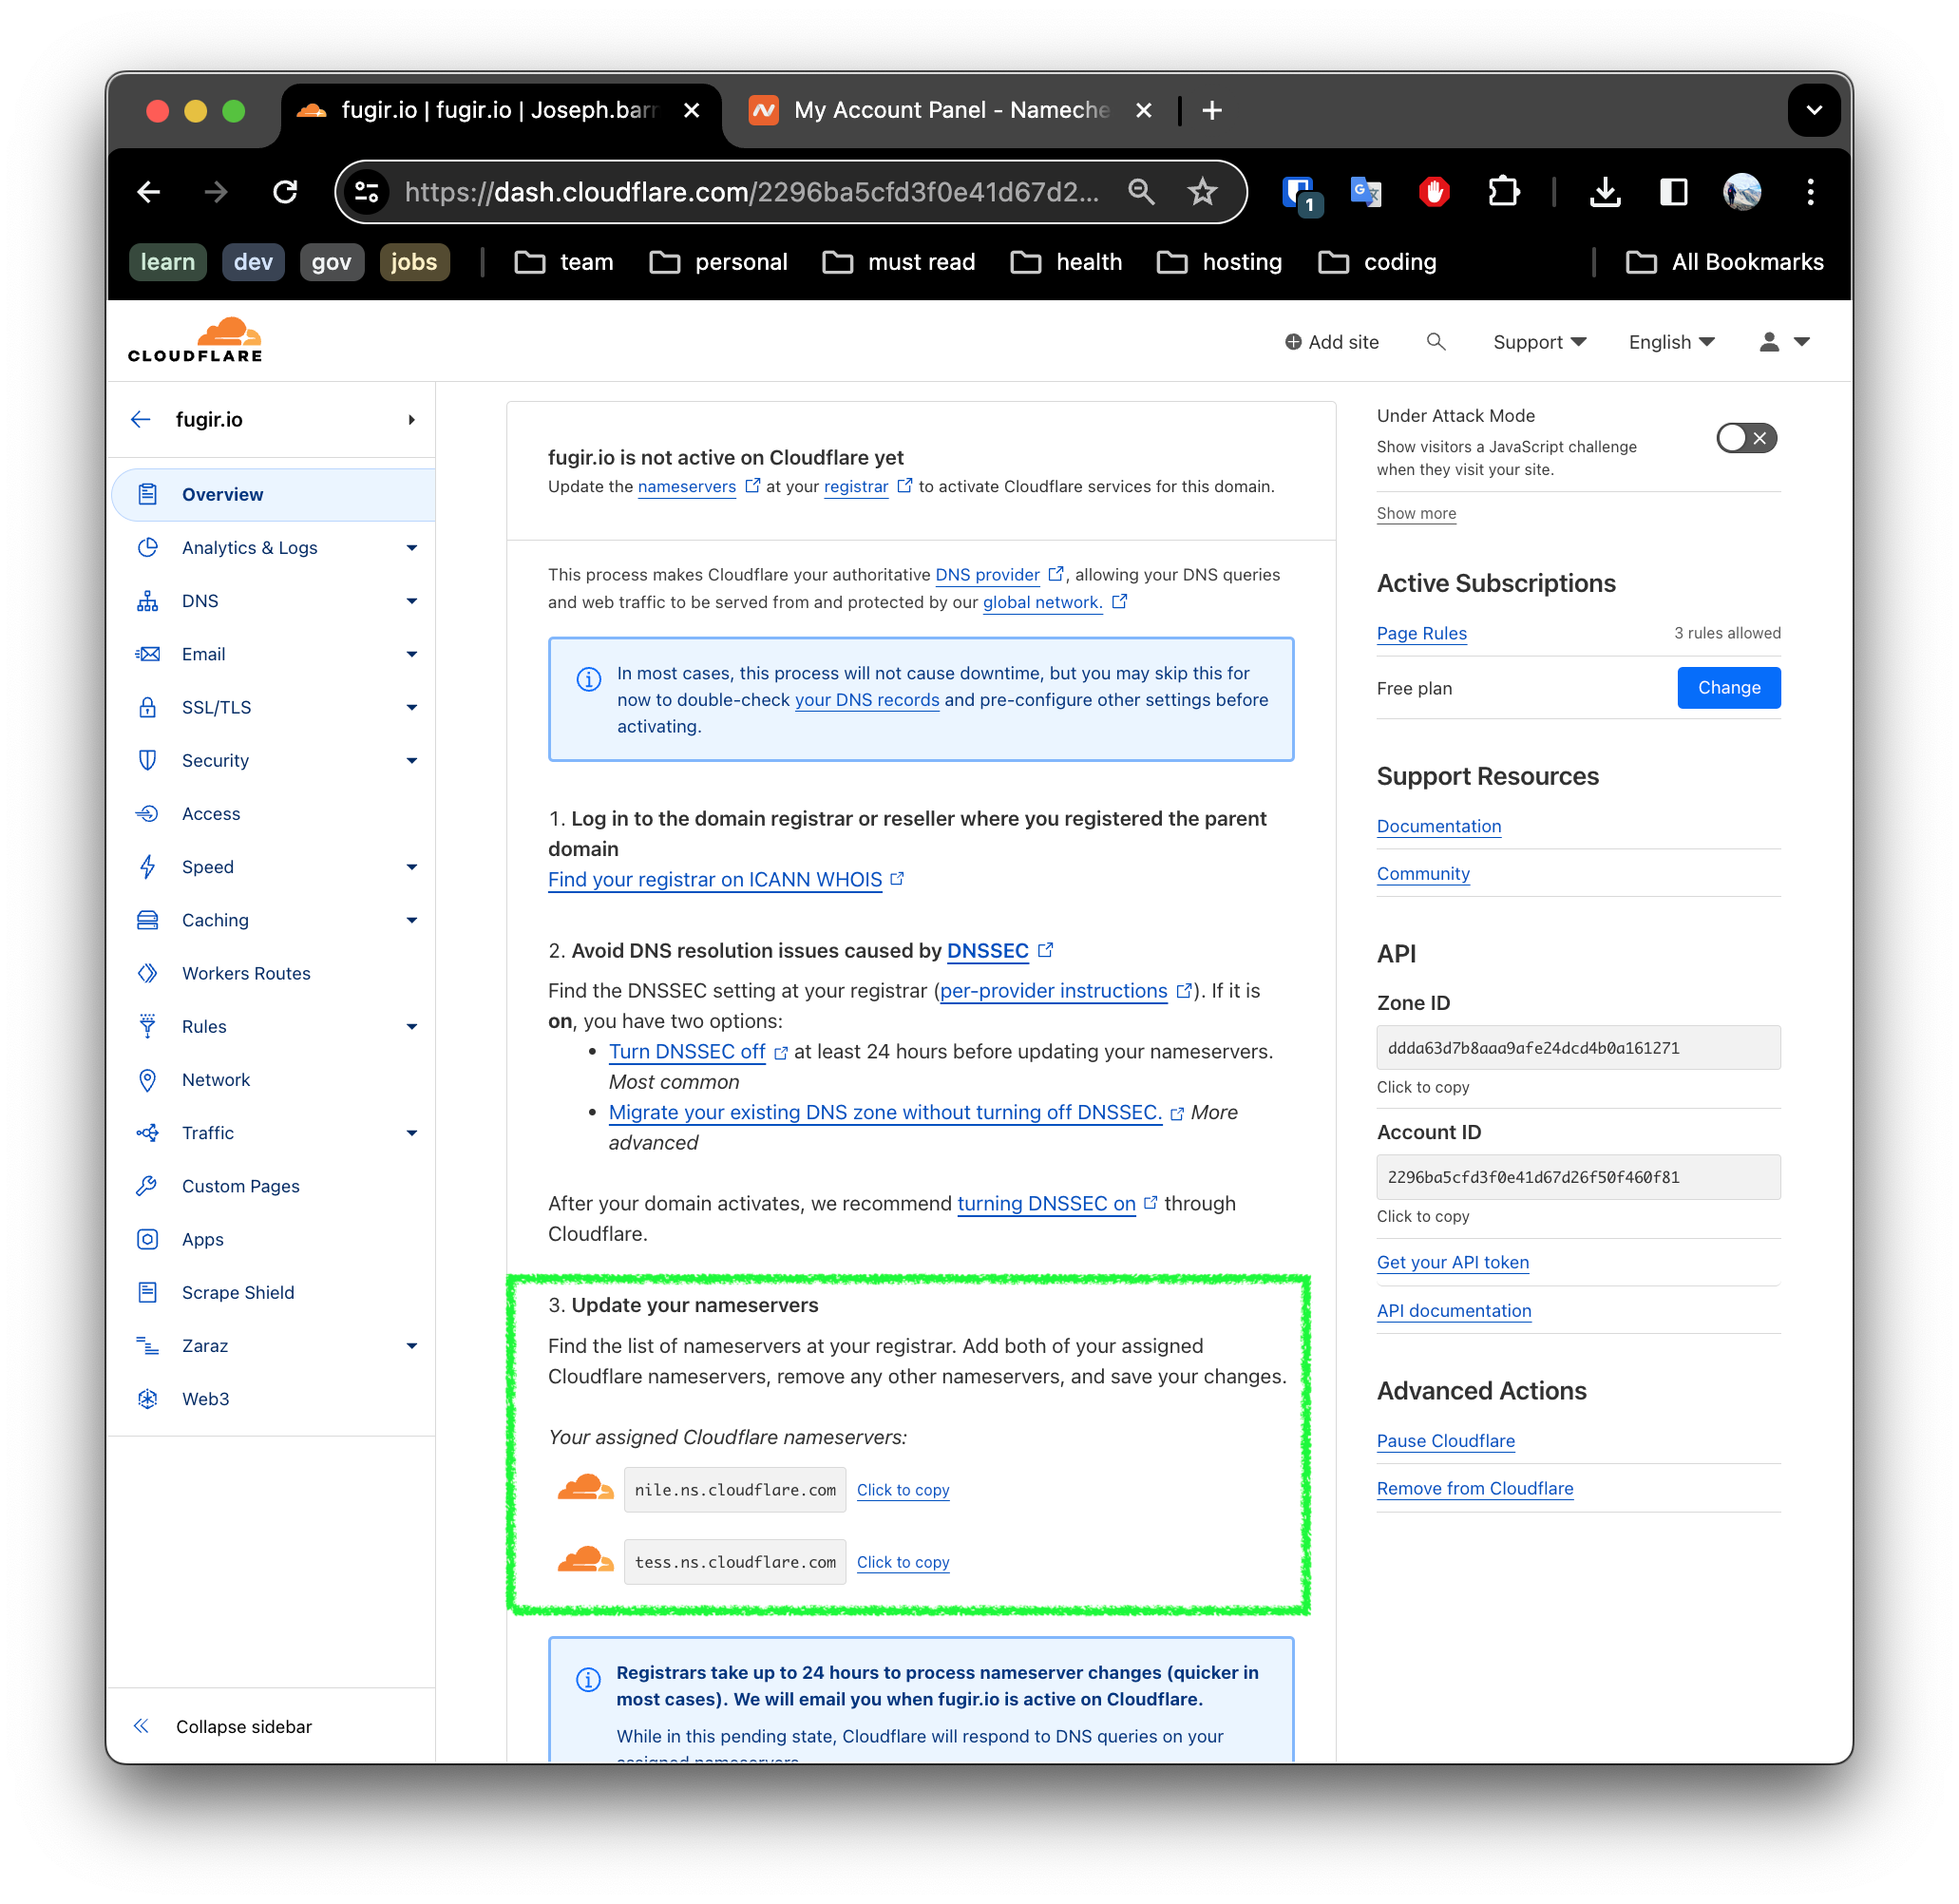
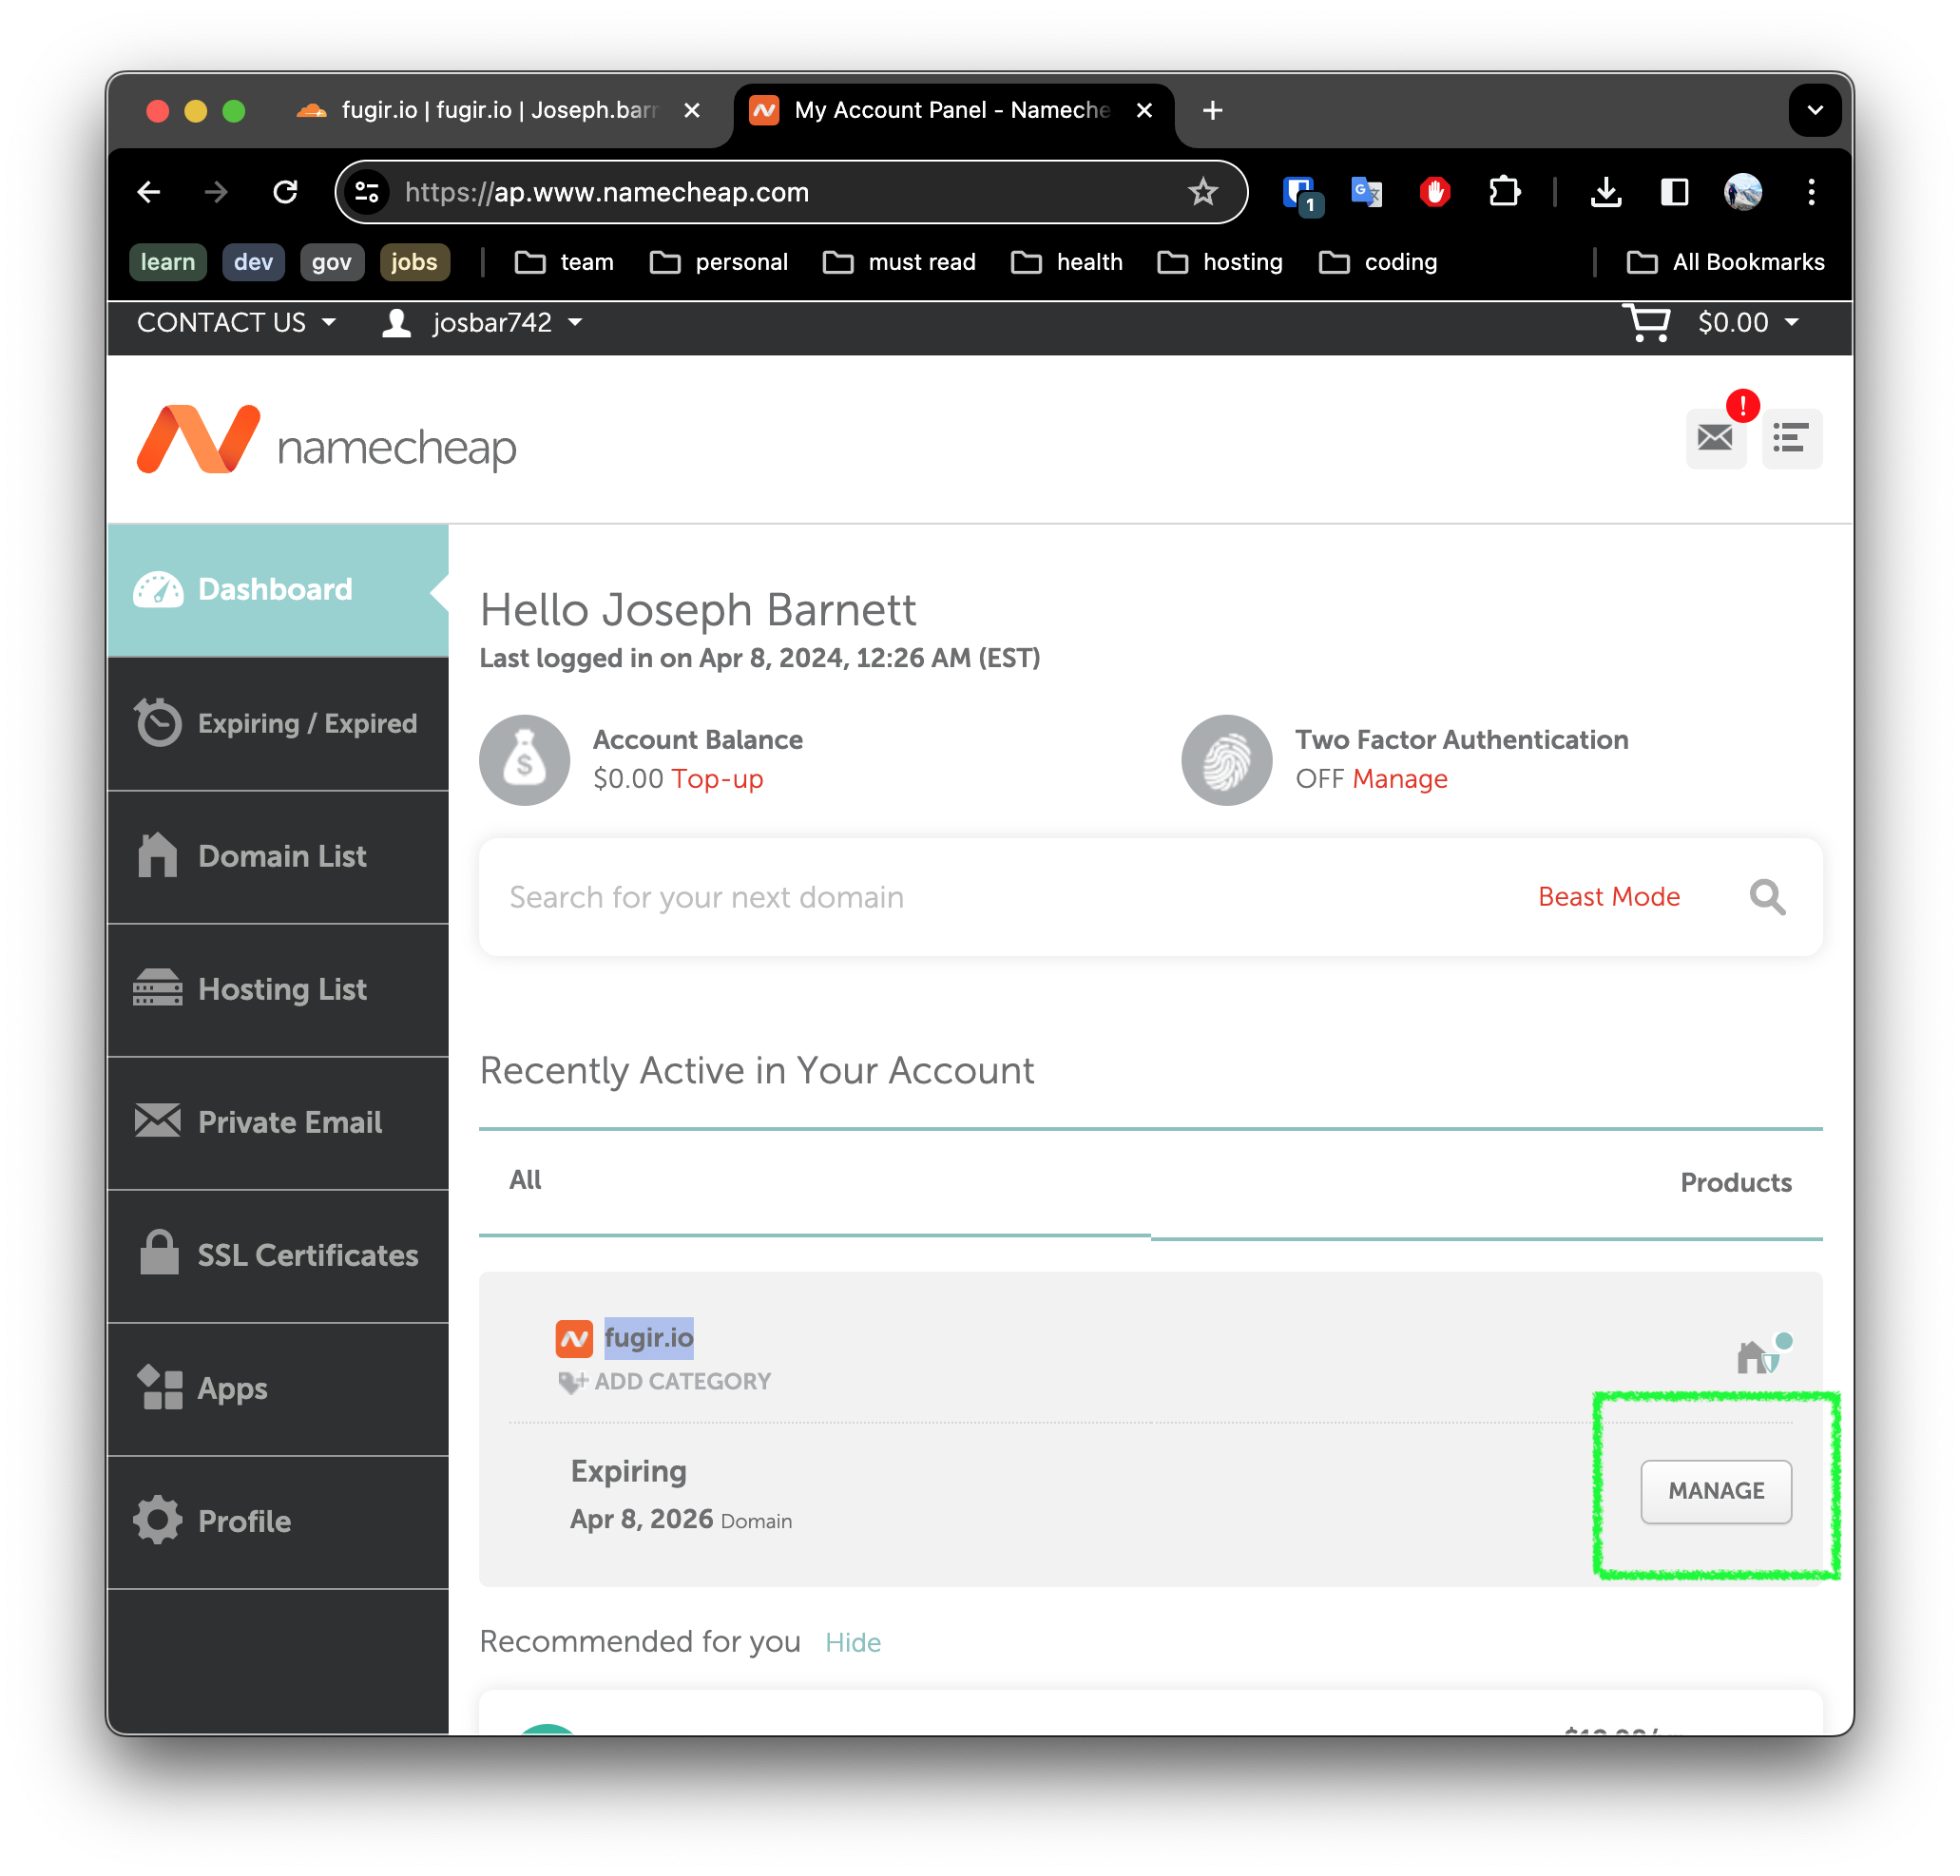
4. Record the name server entires you will need to configure Namecheap
5. Update the Registrar DNS settings
We are using namecheap, so we can login and go to the management dashboard for our domain.
Here we will update the NAMESERVERS configuration, selecting Custom DNS.
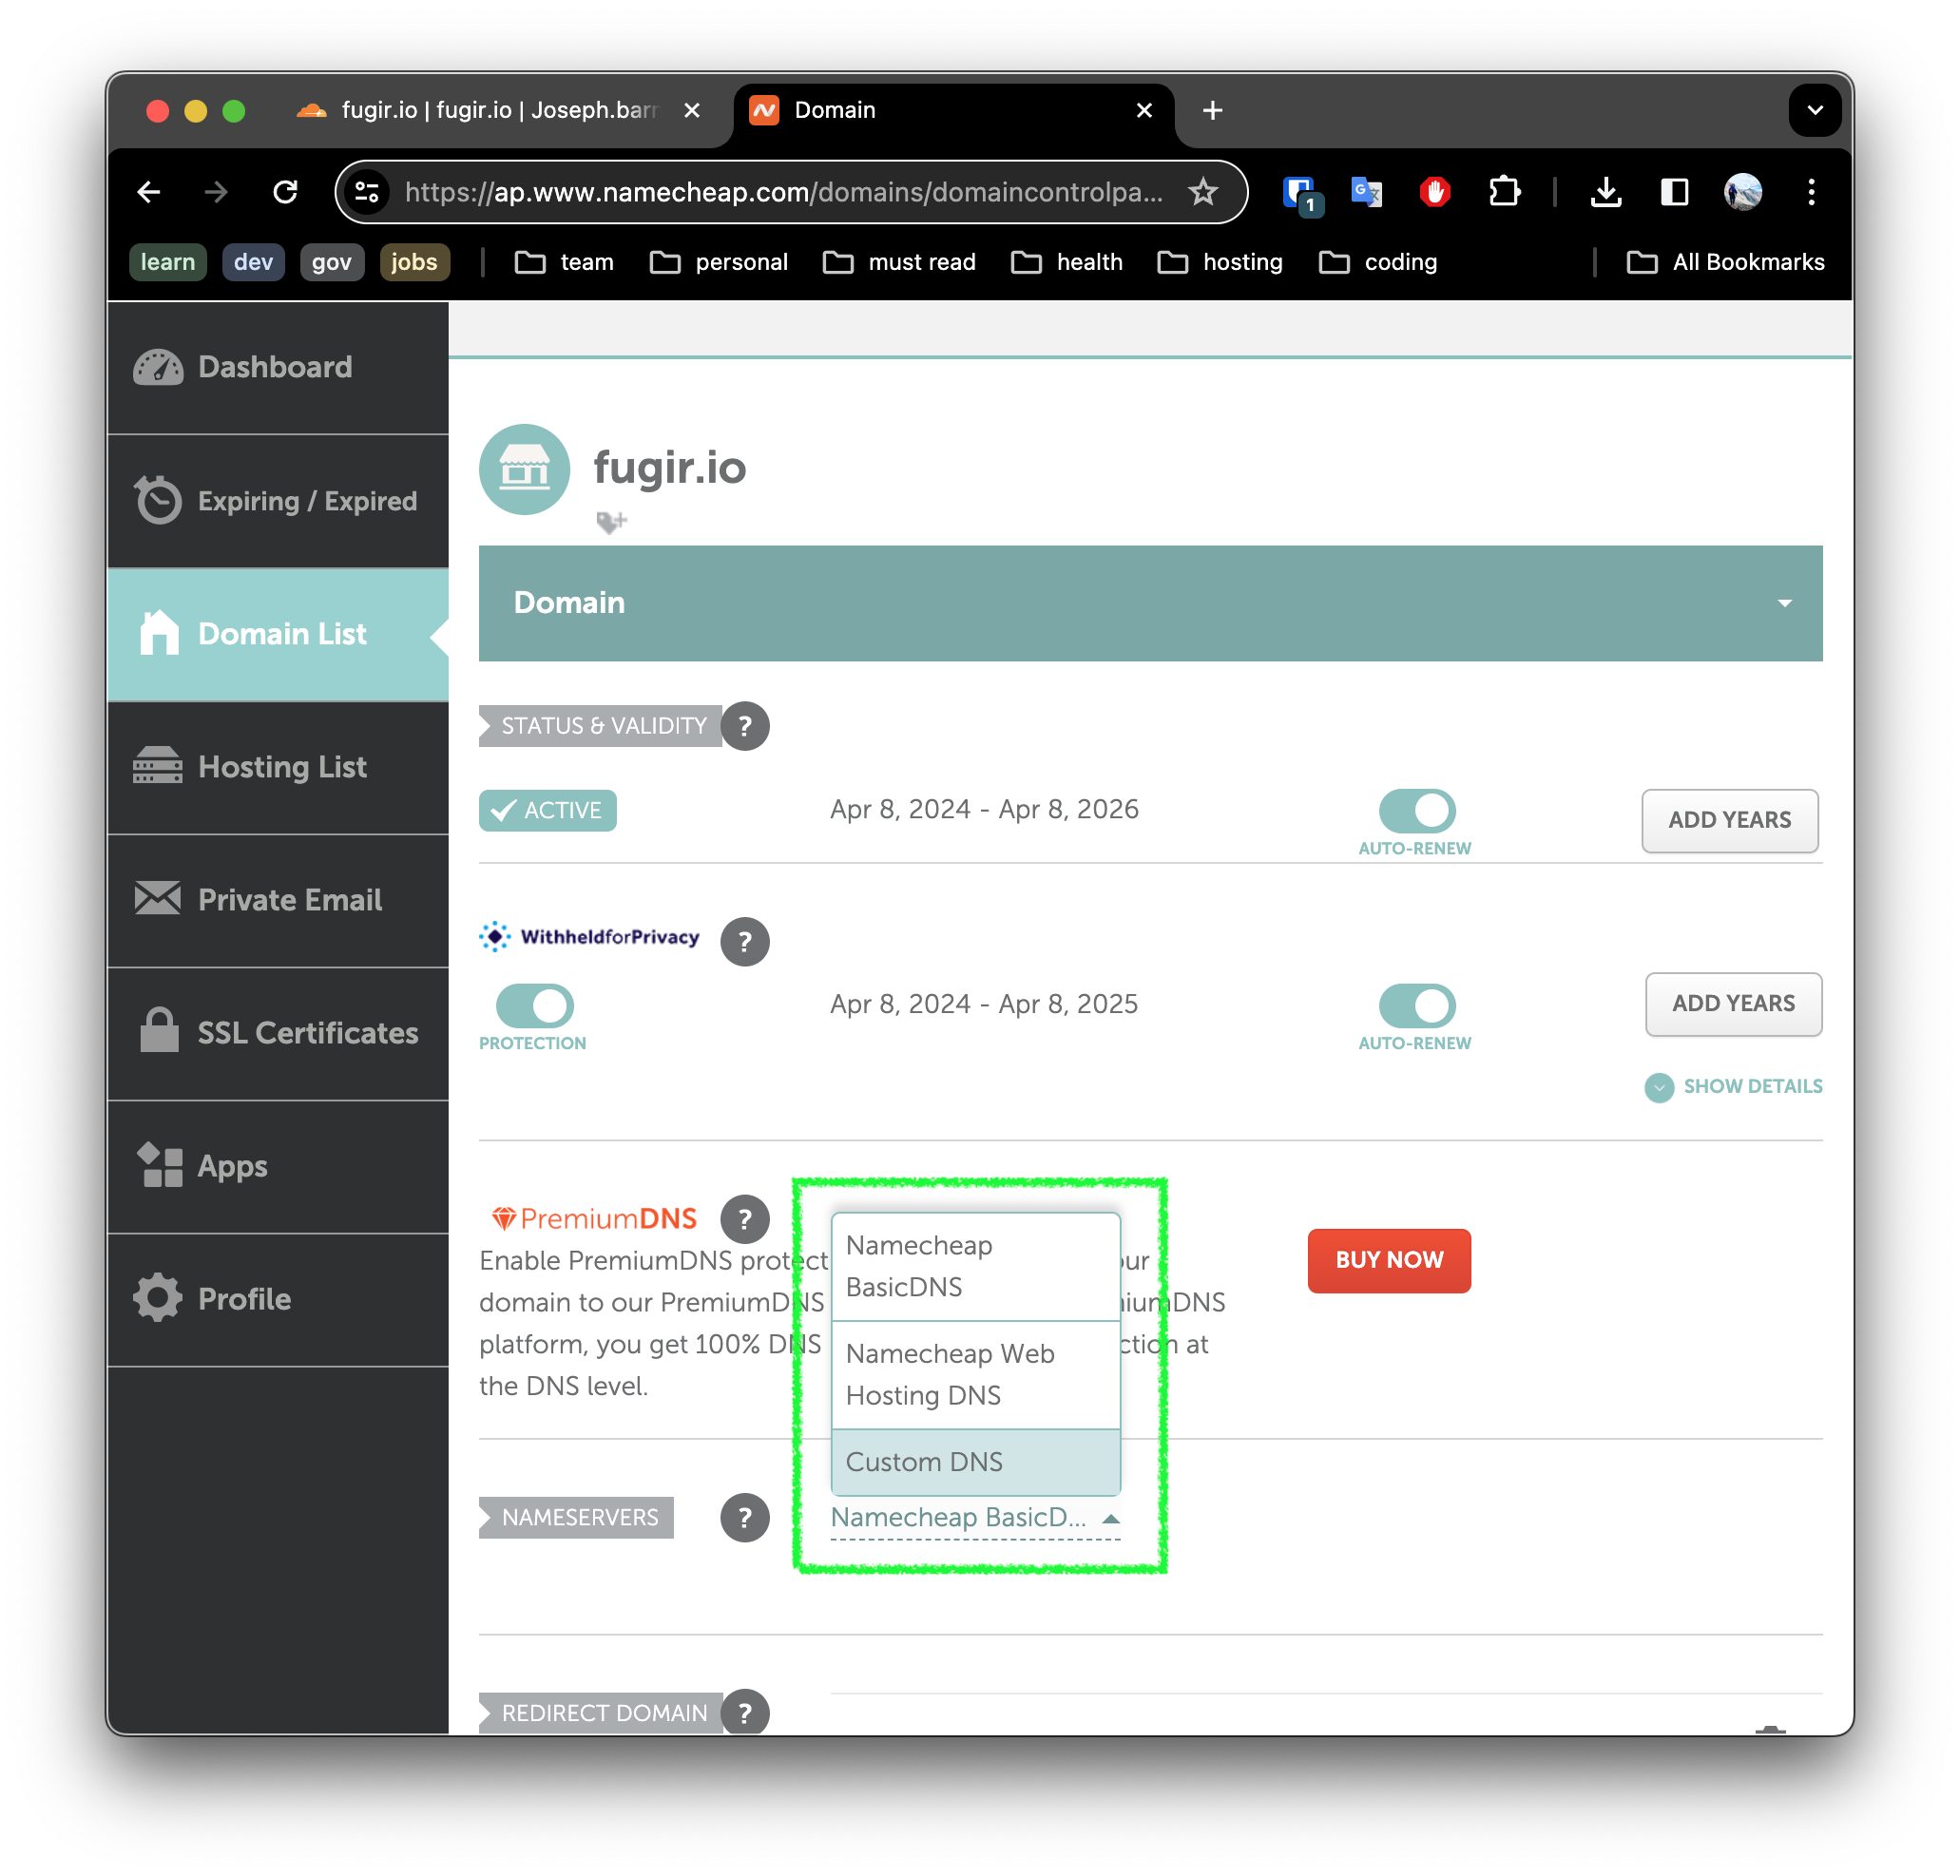
Here we will update the NAMESERVERS configuration, selecting Custom DNS.
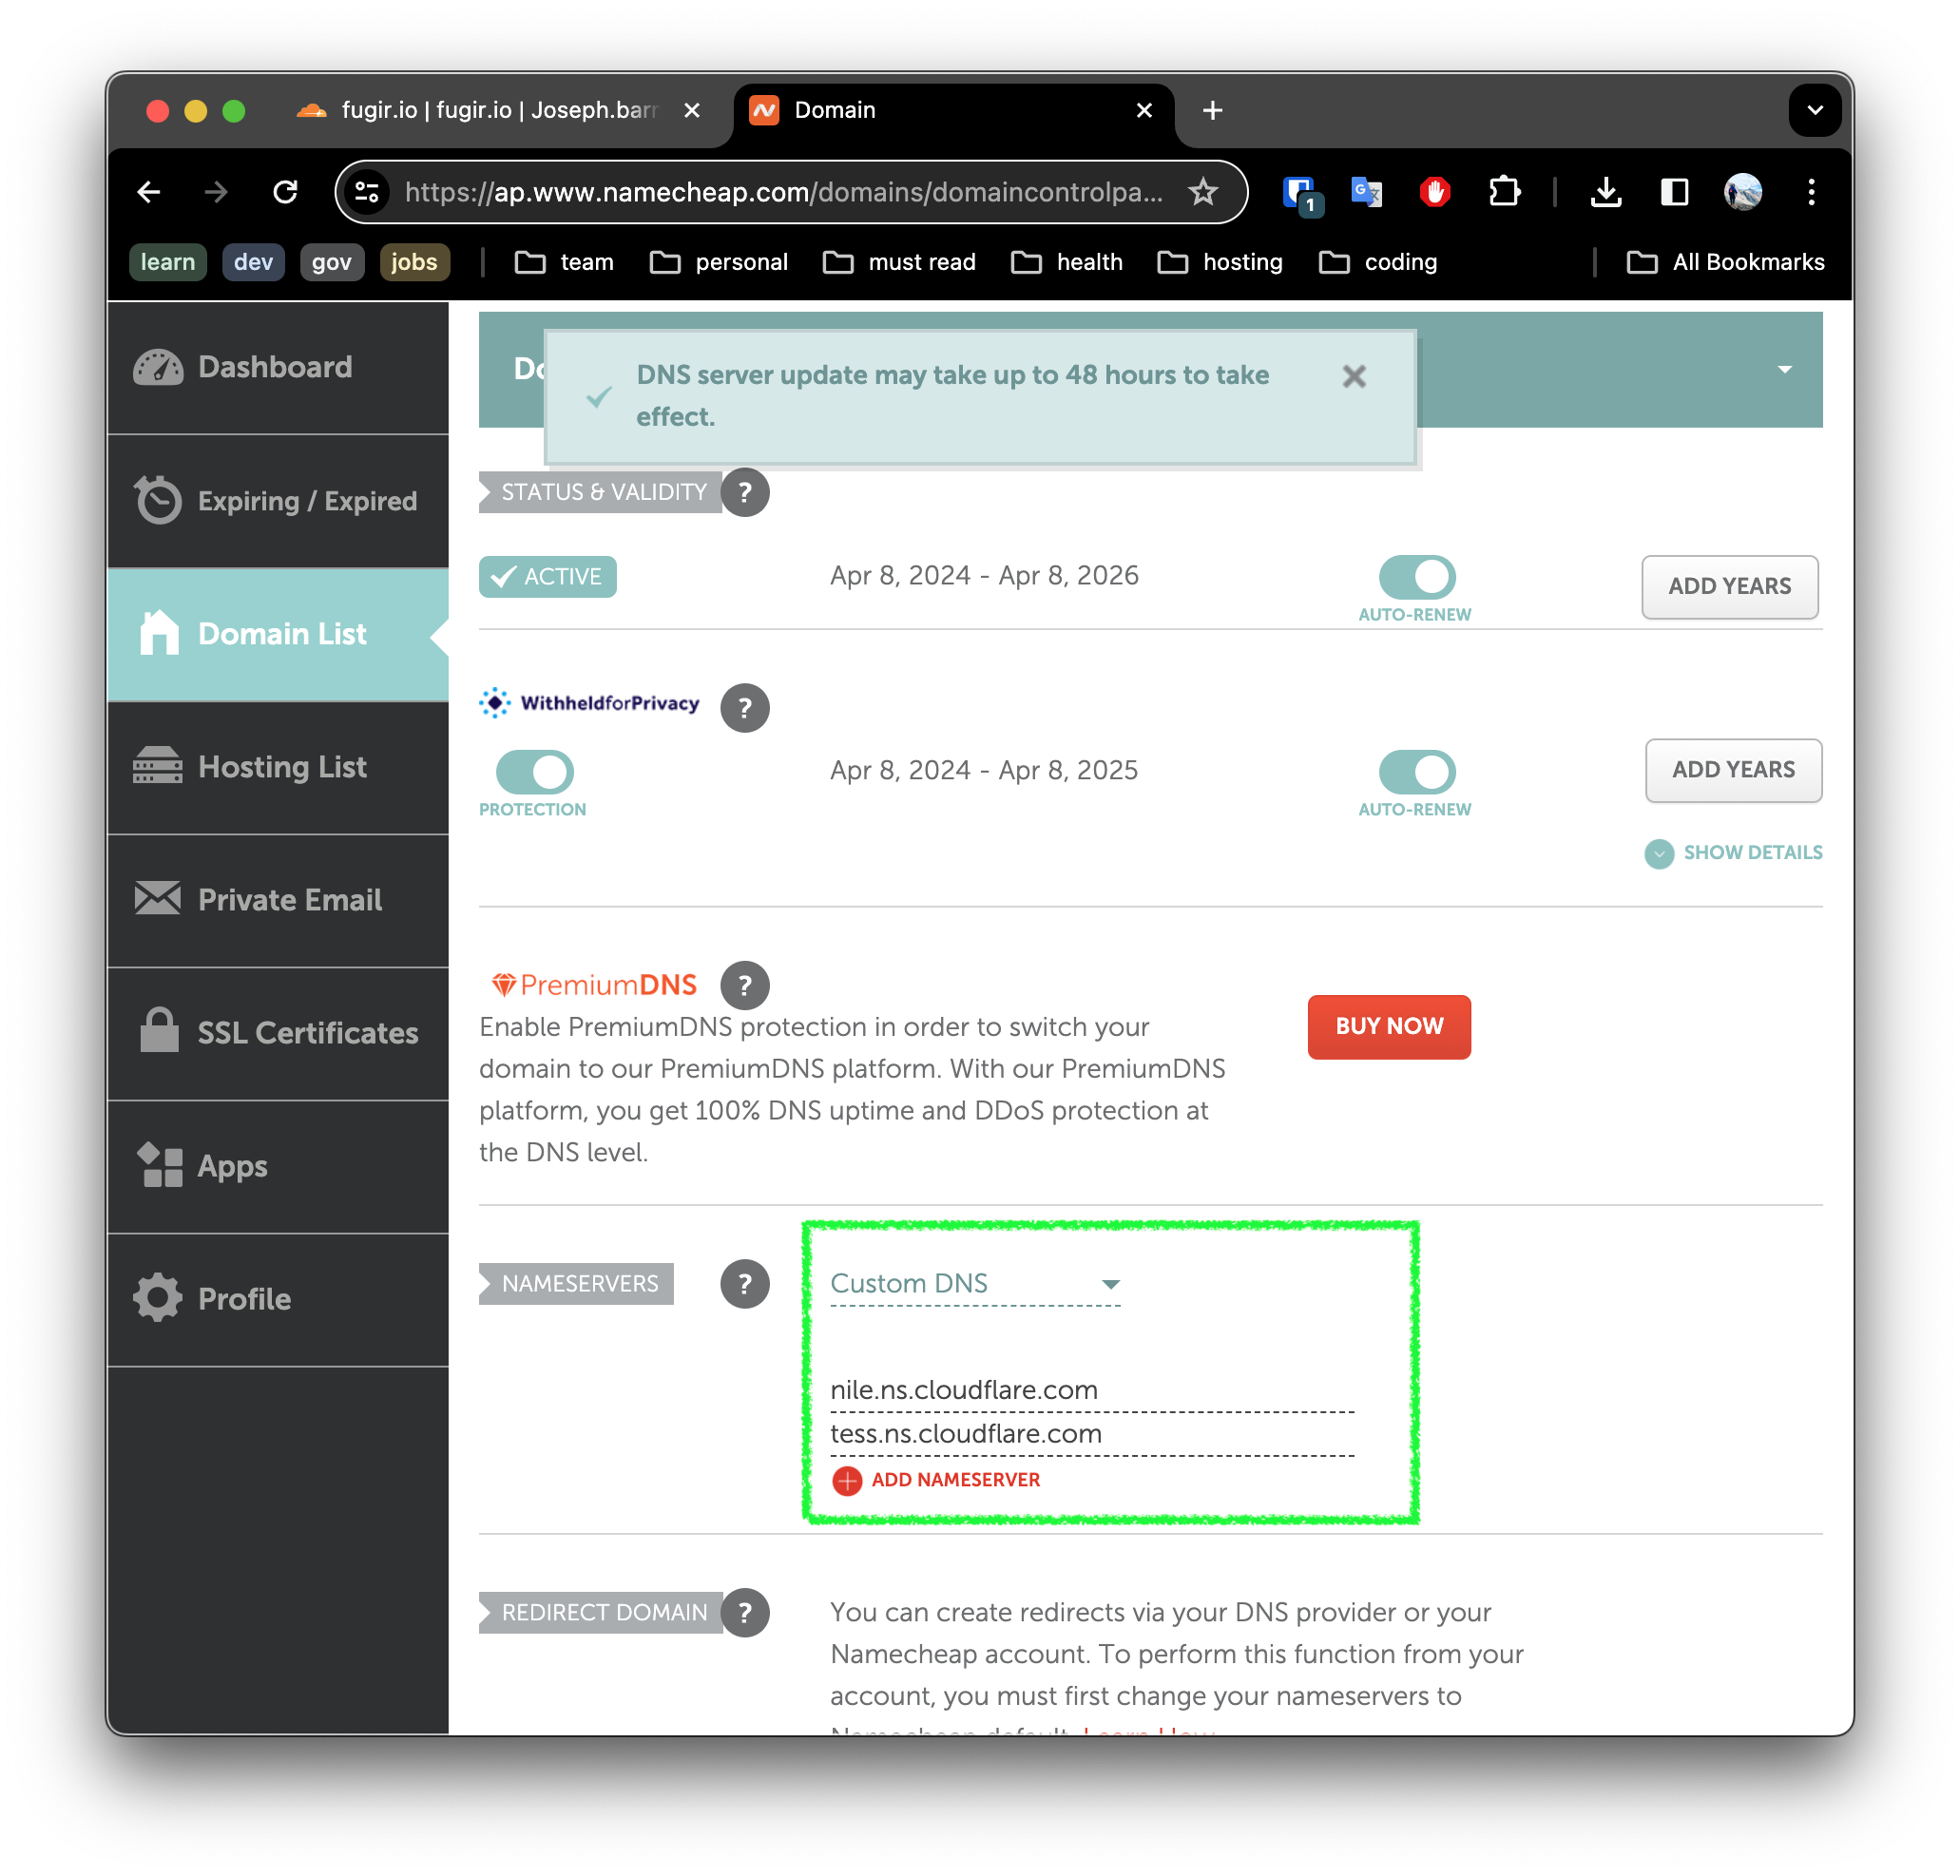
Next we enter the data we collected in step 4.

Then click save - and we should see a success banner.

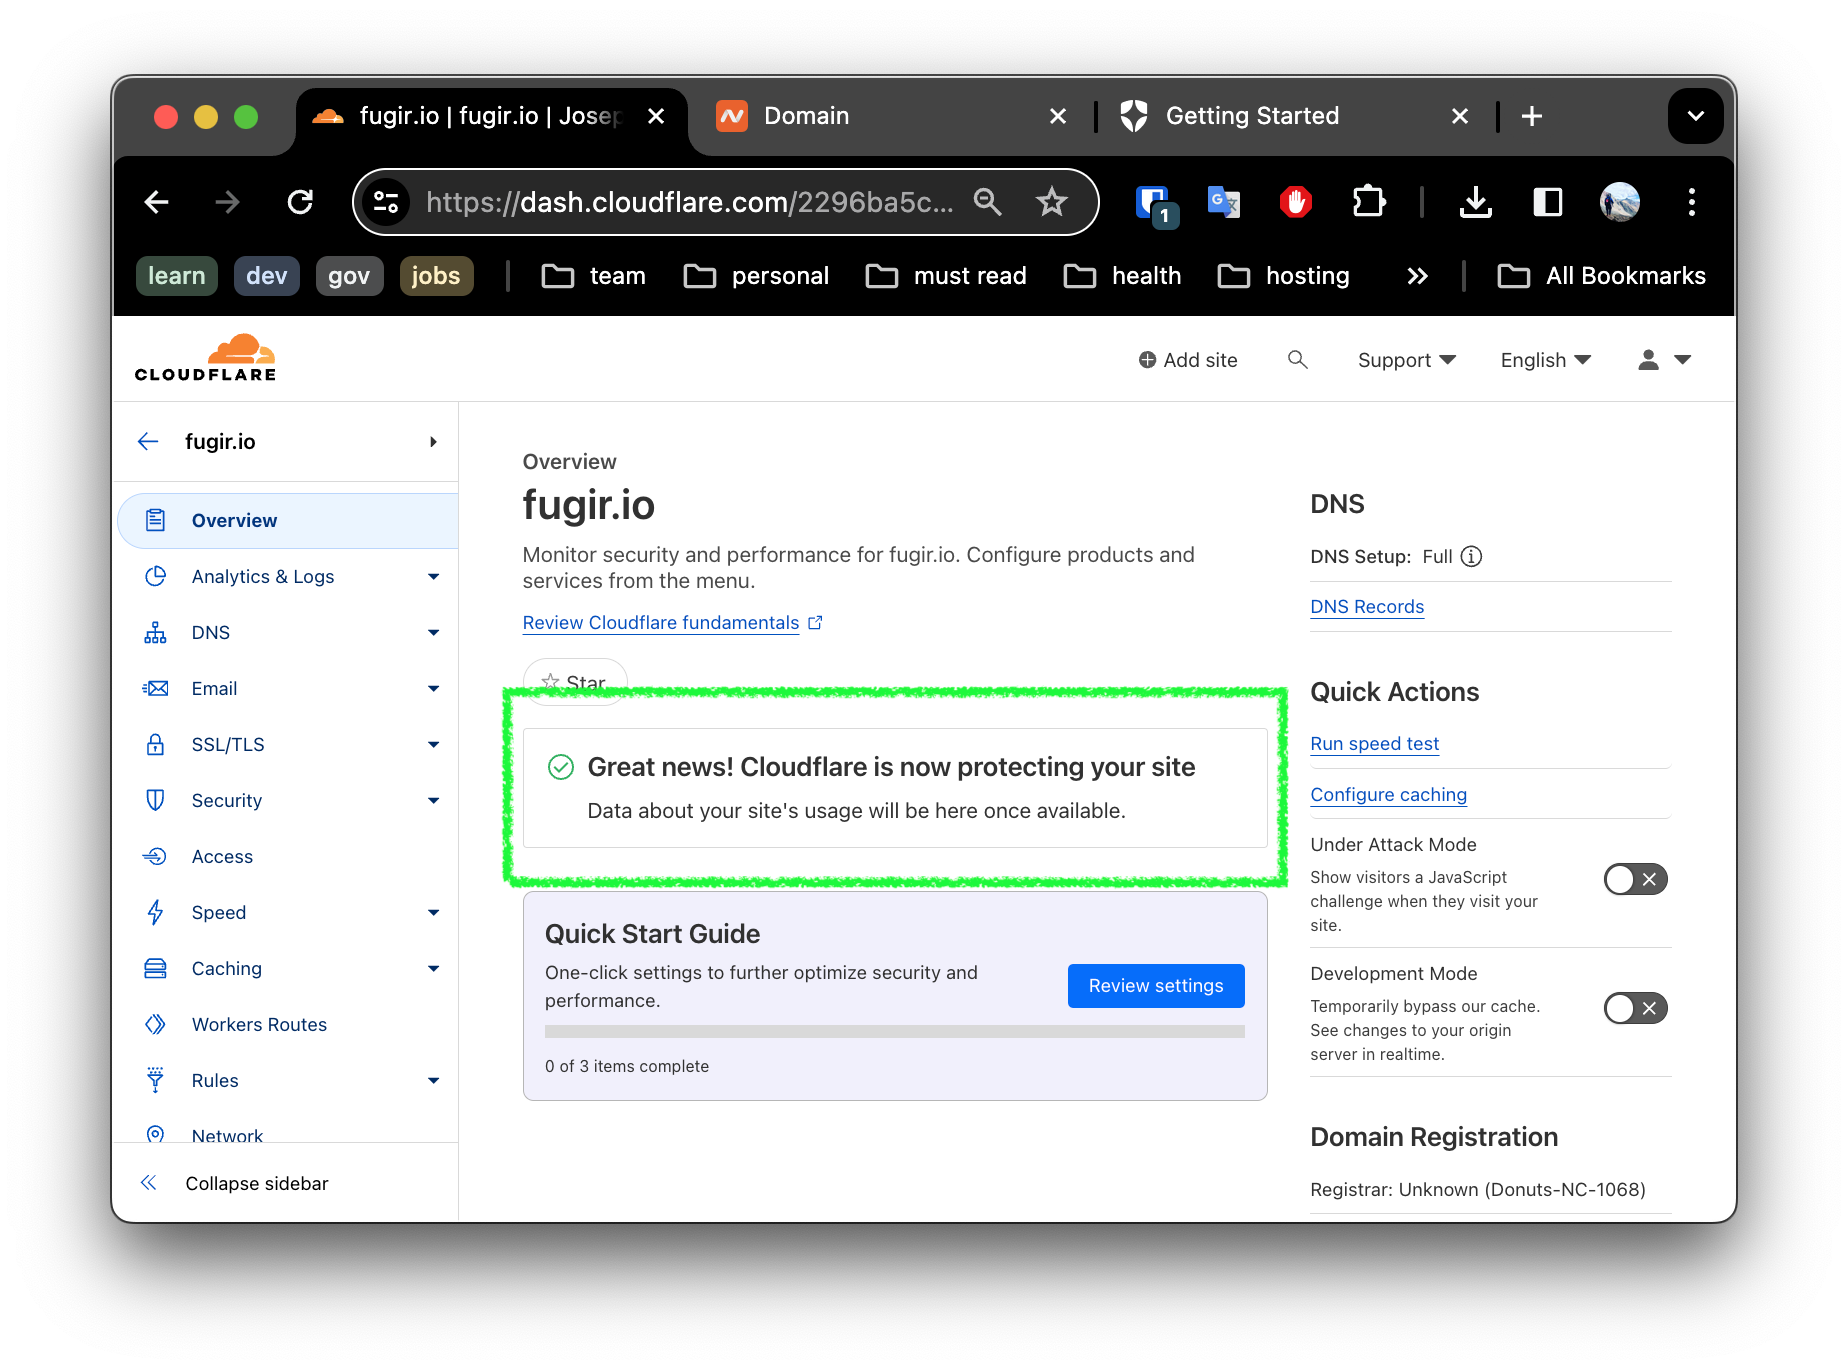
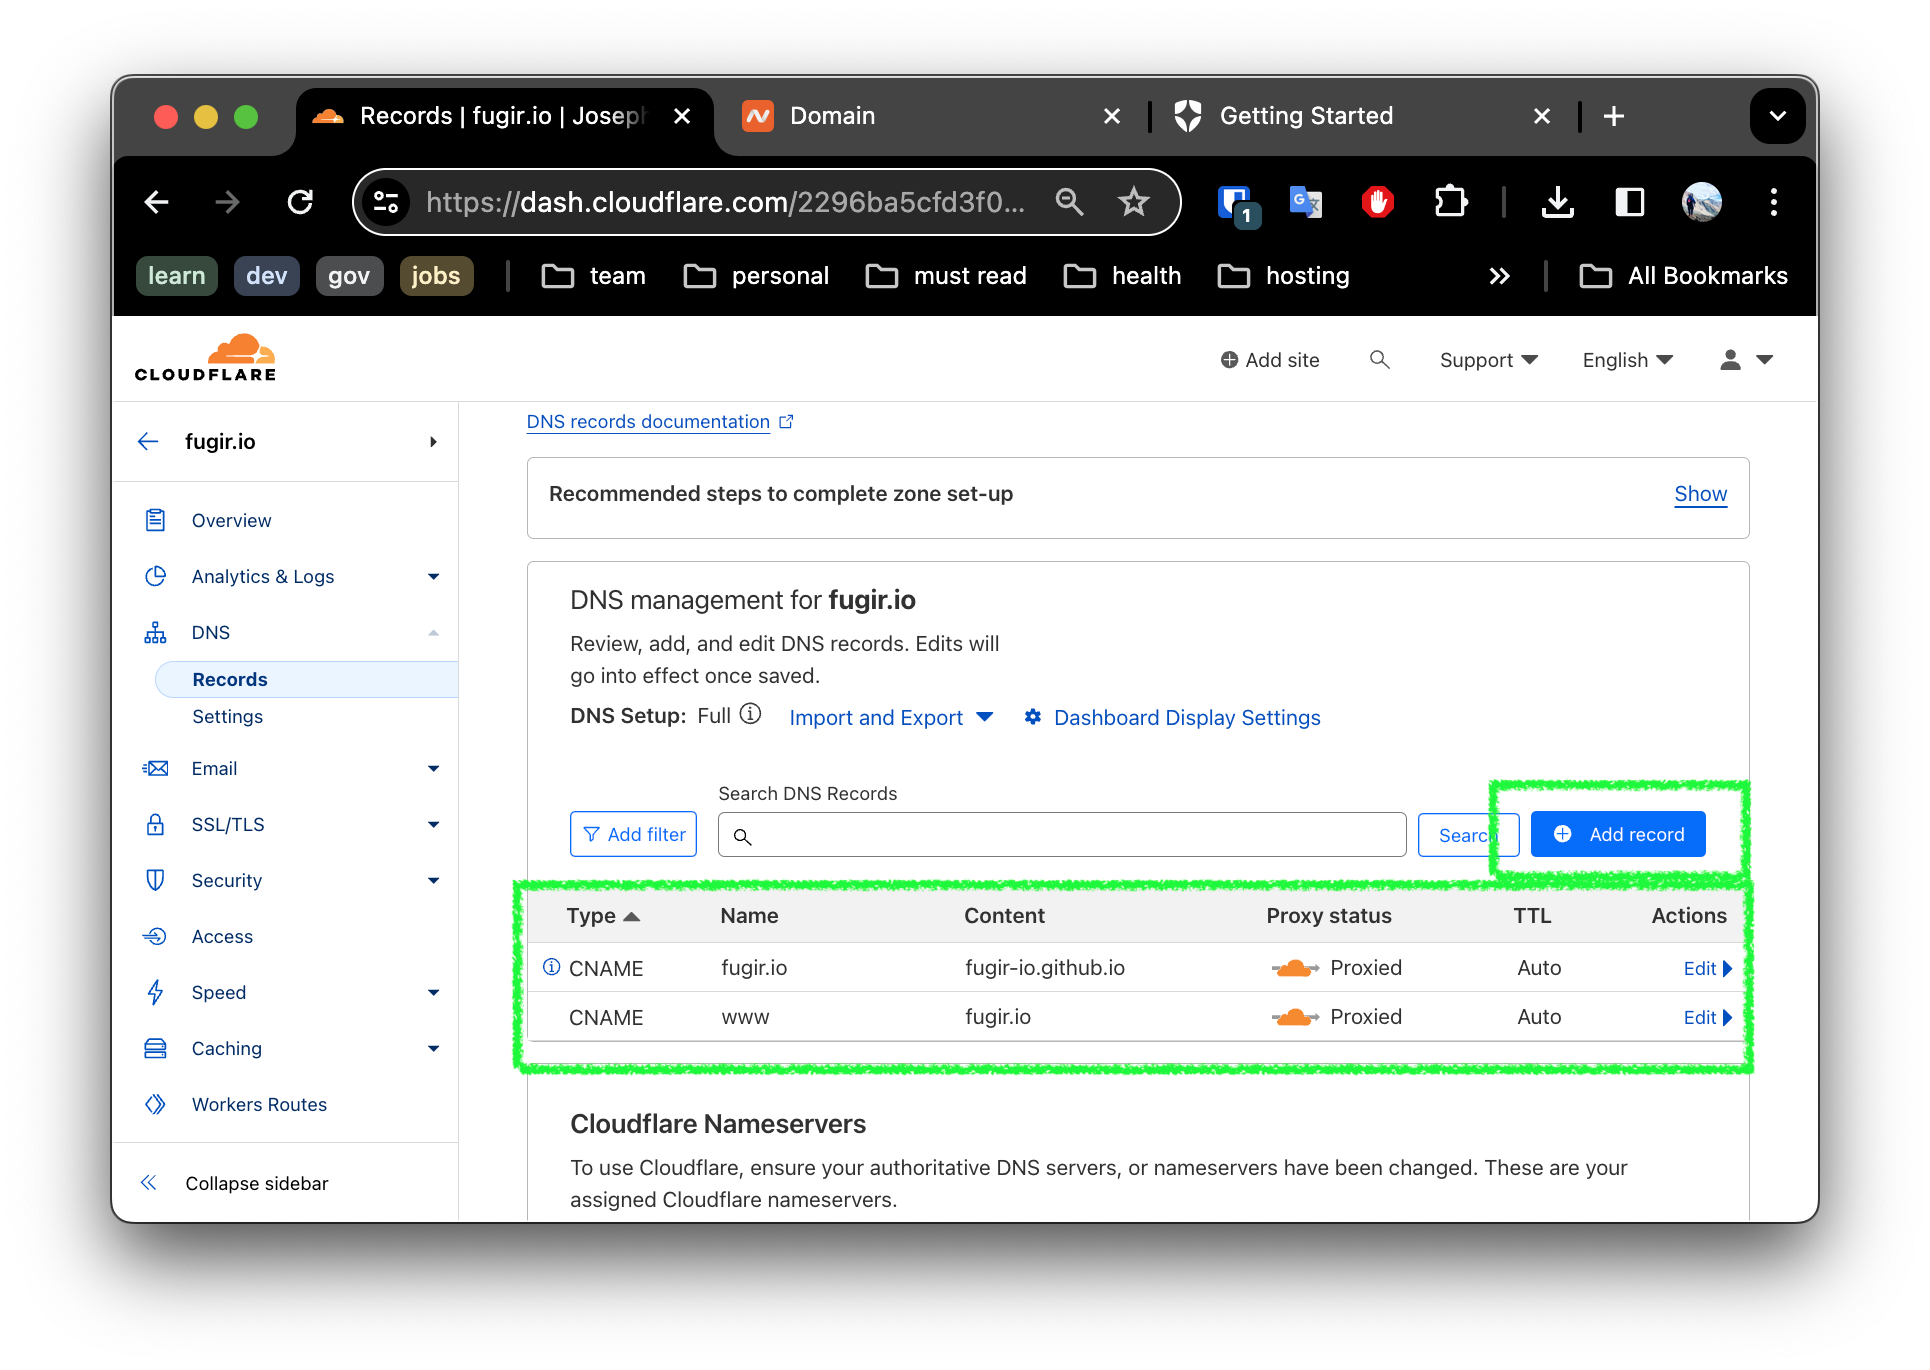
6. Update DNS in Cloudflare
By now, we should see a success banner in Cloudflare as well.
Navigate to the DNS settings, and add two CNAME records for your github pages site as shown:
Thats it! We are all done. The site should be working as it was before!
Summary
We learned how to quickly add strong DDoS protection to our site using Cloudflare. Next we will setup TLS for our services using Let’s Encrypt and Cloudflare. Stay tuned!
Last modified April 9, 2024: new posts (5664c98)